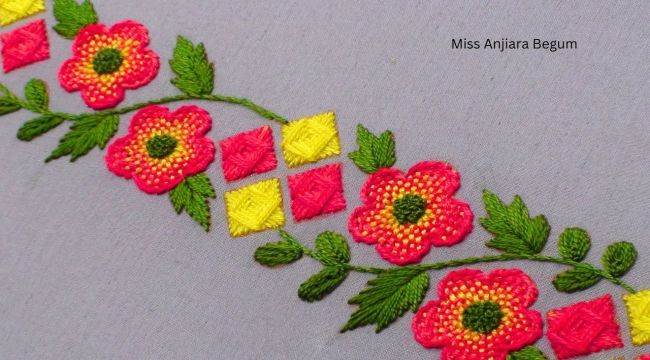
Embroidery is a beautiful and intricate art form that can be used to add a personal touch to any project. Whether you're a seasoned embroiderer or just starting out, creating stunning hand embroidery designs is a rewarding and satisfying experience. In this article, we'll explore how to stitch a stunning hand embroidery red flower design for borders.To get started, you'll need some basic embroidery supplies such as embroidery floss, embroidery needles, an embroidery hoop, and fabric. For this particular design, we recommend using red embroidery floss and a neutral colored fabric such as white or beige.Step 1: Prepare Your Fabric Begin by cutting your fabric to the desired size and shape for your project. It's important to make sure that your fabric is clean and wrinkle-free before starting your embroidery. Once your fabric is prepared, place it in your embroidery hoop and tighten the hoop to hold the fabric taut.Step 2: Choose Your Design For this hand embroidery red flower design, we recommend choosing a simple yet elegant floral design. You can either find a pre-made design online or create your own by sketching it out on paper.Step 3: Transfer Your Design Once you have your design, transfer it onto your fabric using a transfer pen or by tracing it onto tracing paper and then onto your fabric. Make sure to transfer your design onto the fabric in the center of your embroidery hoop.Step 4: Thread Your Needle Choose a length of embroidery floss and separate the strands according to your design. Thread your embroidery needle with the desired number of strands and knot the end of the thread.Step 5: Begin Stitching Start stitching your hand embroidery red flower design by following the outline of your design with a backstitch. Once you've completed the outline, fill in the petals of the flower with a satin stitch. Use long, smooth stitches to create a smooth and polished look.Step 6: Add Details Once you've completed the petals of the flower, add additional details such as the center of the flower and any leaves or stems. Use different embroidery stitches such as the French knot or stem stitch to add texture and depth to your design.Step 7: Finish Your Embroidery Once you've completed your hand embroidery red flower design, carefully remove the fabric from your embroidery hoop and trim any excess threads. Your embroidery is now ready to be used as a border for a variety of projects such as tablecloths, napkins, or clothing.In conclusion, stitching a stunning hand embroidery red flower design is a beautiful and rewarding experience. By following these steps, you can create a stunning floral border that will add a personal and elegant touch to any project. So grab your embroidery supplies and start stitching today!
Embroidery
14 April 2023 - 23:59
"Stitch a Stunning Hand Embroidery Red Flower Design for Borders"
Embroidery
14 April 2023 - 23:59
This news 456 hits received.
These news may also interest you
