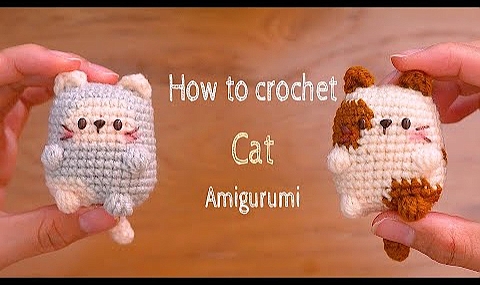
Creating a cute and simple cat amigurumi is a delightful crochet project. Here's a basic pattern to help you get started. Customize it with your preferred colors and details.
Materials:
- Worsted weight yarn in cat colors (main color for the body, additional colors for details)
- Crochet hook appropriate for your yarn
- Safety eyes or yarn for eyes
- Fiberfill stuffing
- Yarn needle
- Scissors
Abbreviations:
- Ch: Chain
- Sc: Single crochet
- Inc: Increase (work 2 sc in the same stitch)
- Dec: Decrease (single crochet two stitches together)
- Sl st: Slip stitch
Cat Body:
Round 1:- Start with a magic ring, work 6 sc into the ring. Pull tight to close. (6)
Cat Head:
Follow the same pattern as the body but stop at Round 10. Fasten off, leaving a long tail for sewing. Attach safety eyes and embroider a nose using yarn.Cat Ears (Make 2):
1. Ch 3:- Work 3 sc in the second chain from the hook.
Assembly:
- Attach Head:
- Sew the head to the top of the body.
- Embroider Eyes:
- Embroider the eyes using black yarn or attach safety eyes.
- Attach Ears:
- Sew the ears to the sides of the head.
- Optional: Add Tail and Details:
- You can add a small pom-pom or yarn tail to the back of the cat. Also, you can add facial details or accessories to personalize your amigurumi cat.
